You can manage DNS records either through your WhoGoHost client area (if you don’t have cPanel) or directly via cPanel (if you do). Before adding any records, make sure your domain’s nameservers are set to: nsa.whogohost.com and nsb.whogohost.com.
Adding Records via Client Area
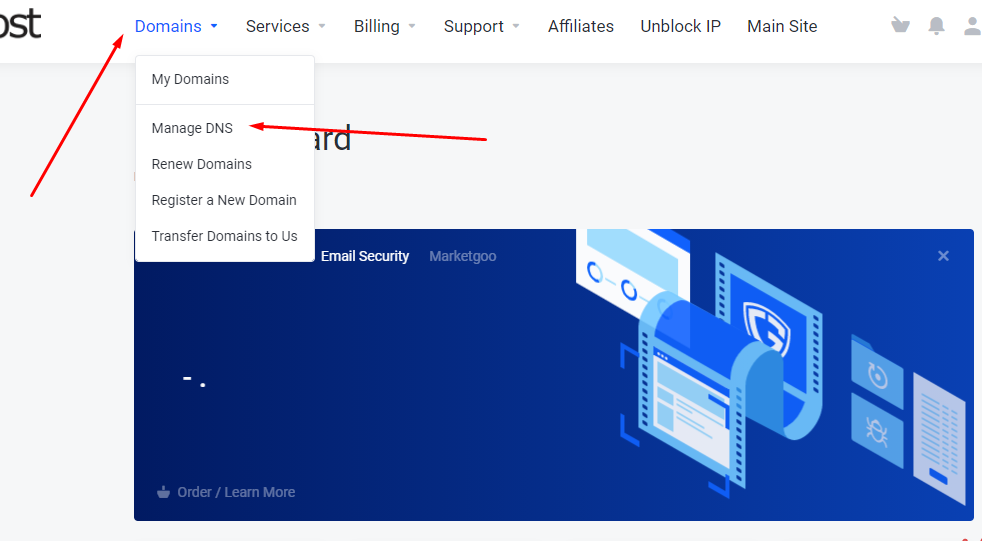
- Log in to your client area
- Click on Domains, and select manage DNS from the dropdown list.
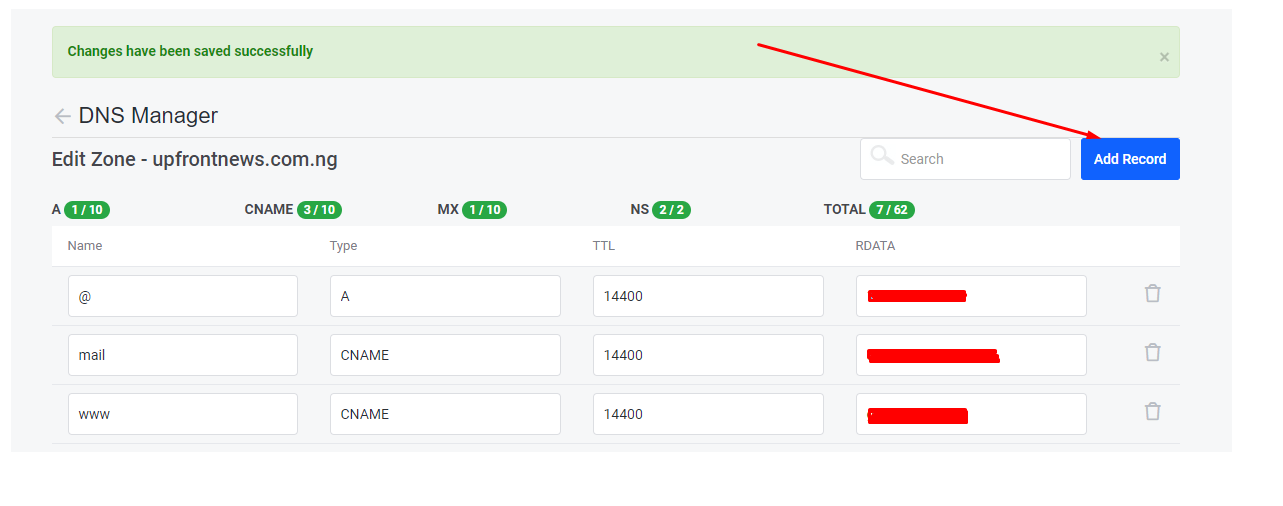
- If needed, click Add Zone to create a new zone (or Edit an existing zone). Click here to learn how to create a zone
- Click on the Add Record button.
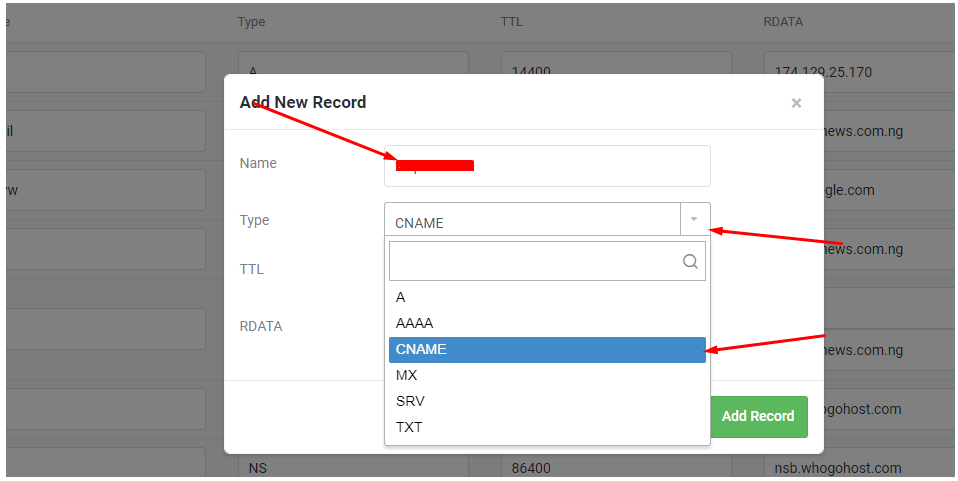
- Fill in the fields:
- Name: Enter Your domain name or the value given to you for this.
- TTL: 14400
- Type: e.g. TXT, CNAME, SRV, NS, A, MX, etc.
- Record: The code or destination of the record added
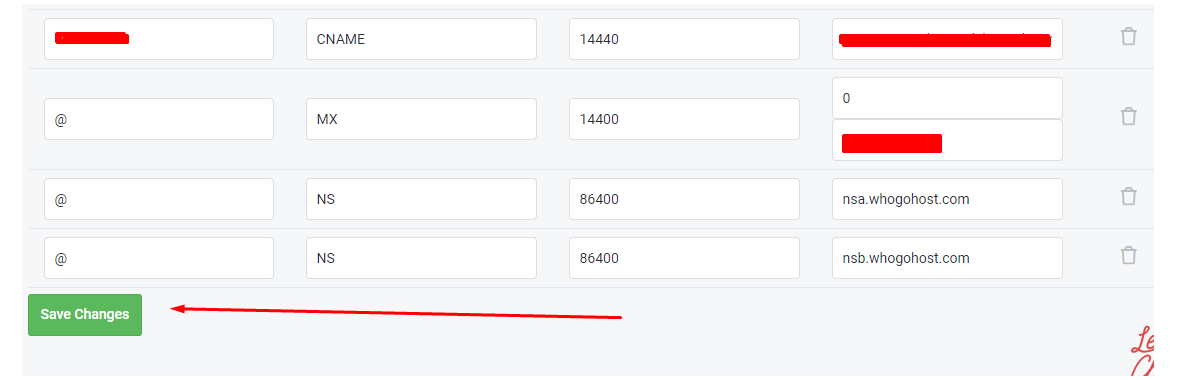
- Click on the ADD RECORD button and then Save Changes.
 <
<
Adding Records via cPanel
If you already have a cPanel account for your domain, follow the steps below:
- Log in to the cPanel via yourdomain/cpanel or via by clicking the cPanel button for your hosting account in your client area.
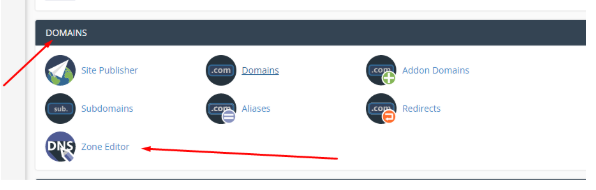
- In the Domains section, click on Zone Editor.
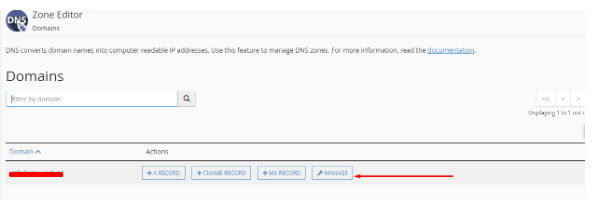
- Once you are in, click on Manage.
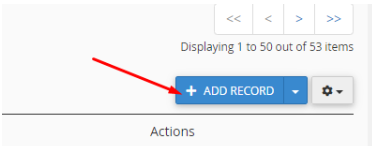
- Click on Add Record.
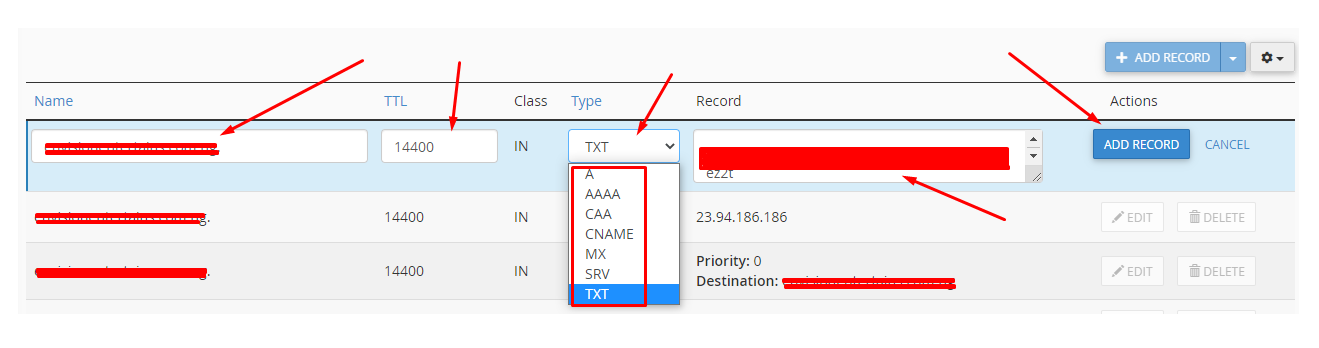
- Enter the records below in the appropriate fields
- Name: Enter Your domain name or the provided value.
- TTL: 14400
- Type: e.g. TXT, CNAME, SRV, NS, A, MX etc.
- Record: Code or destination.
- Click on the ADD RECORD button to submit.

Managing DNS records is straightforward, whether you’re in cPanel or the client area. Just make sure your nameservers are correctly pointed before making changes.
