To back up your website, you are going to need the following information:
- Website URL
- Hostname/IP address
- SFTP/FTP username
- SFTP/FTP password
- Port number
STEP 1- Login to your Codeuard dashboard.
- To access your dashboard, log in to your client area via this link Client Area
- Click on services>>>My services.

Â
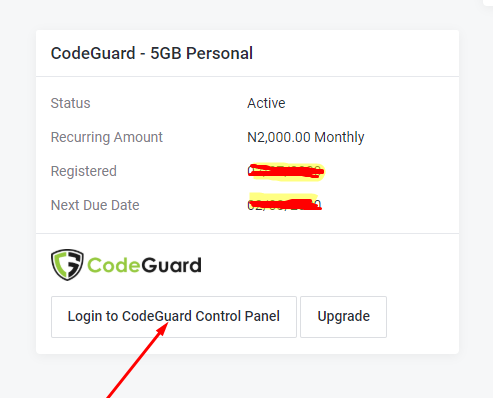
3. Click on the hosting account for which you purchased the backup service and click on Addons at the top left-hand side of your page.

Â
4. Click on Login to Codeguard Control Panel.
Â
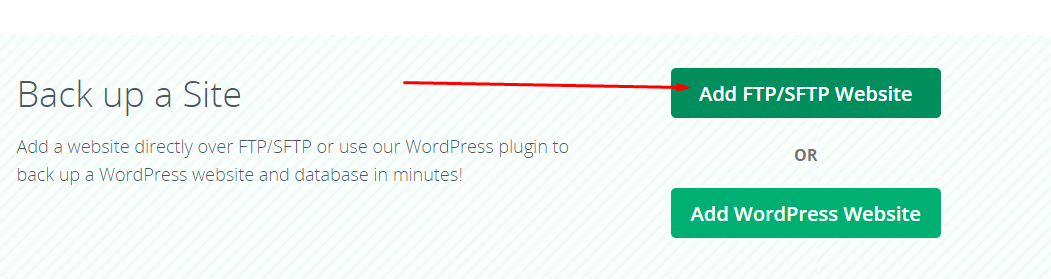
5.C on the option to "Add FTP/SFTP Website."
 Step 2- Enter your credentials
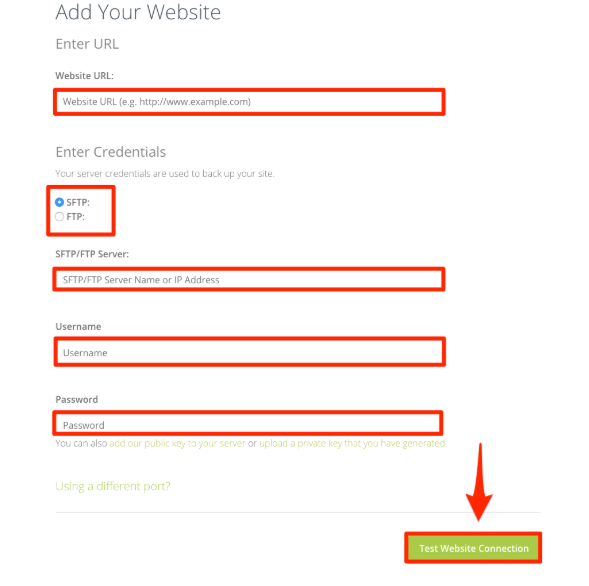
- Website URL:Â The URL of the website you are adding.
- Protocol: Select SFTP and the port number is 22.
- SFTP or FTP Server:Â The server on which your website is hosted or the IP address of the server.
- User Name:Â Your Cpanel username.
- Password: Your Cpanel password. Â
- Once you've entered your credentials, click "Test Website Connection". If the credentials you entered are correct you will be directed to the next step.
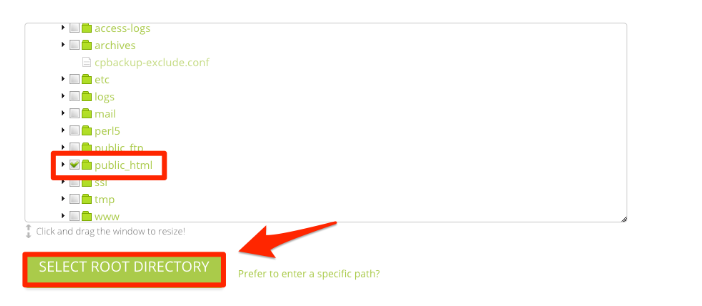
Step 3-Â Â Select root directory
1. Click the checkbox next to the directory you would like to be your root directory. We recommend you choose the directory that contains all the files you would like backed up. Please note that any new file/folder added to your root directory in the future will be added to your backups.
2. Once you've selected it, click "Select Root Directory."
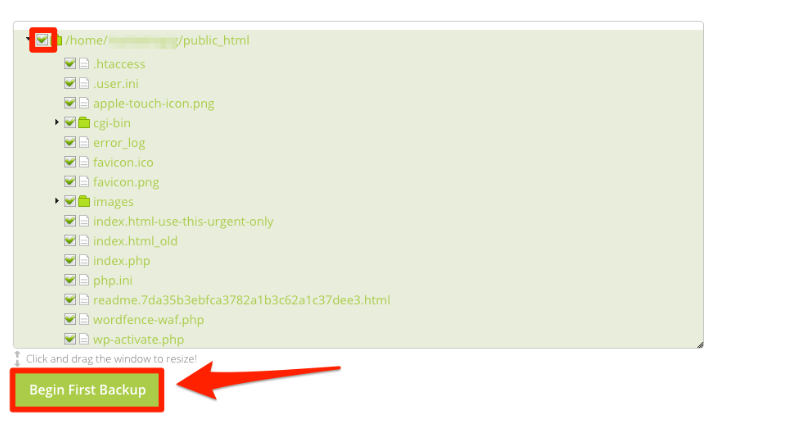
Step 4 - Select The Website Content To Be Backed up.
1. Scroll down to the next section and select the content that you would like backed up.
2. To select everything inside your root directory, simply click the checkbox next to your root directory. Then click on "Begin First Backup."
3. Your website backup has now begun! Once it is completed, you will be prompted to add a database. If you have a database associated with your website it is very important to back up the database as well.
Step 4 - Backup Your Database.
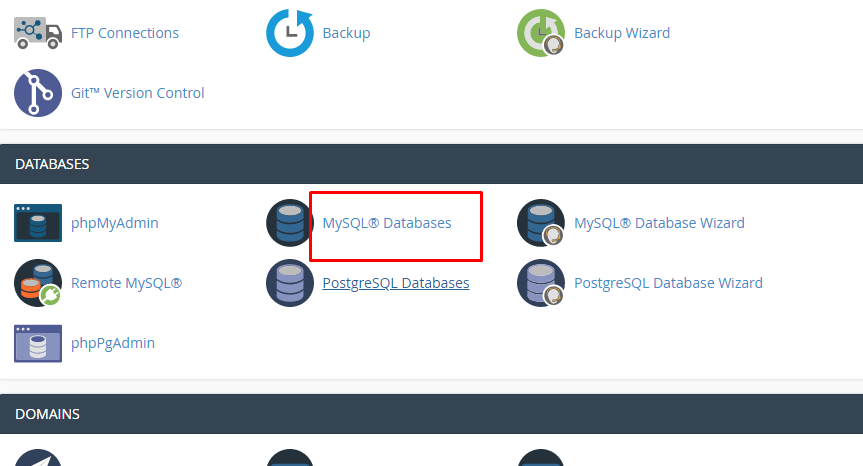
- Before you proceed to backup up your database,the first thing to do is create a database user for Codeguard then assign this user to your existing databases and grant all previledges. To achieve this, login to cpanel using the URL: yourdomain.com/cpanel.
- Â Click on MYSQL Databases.
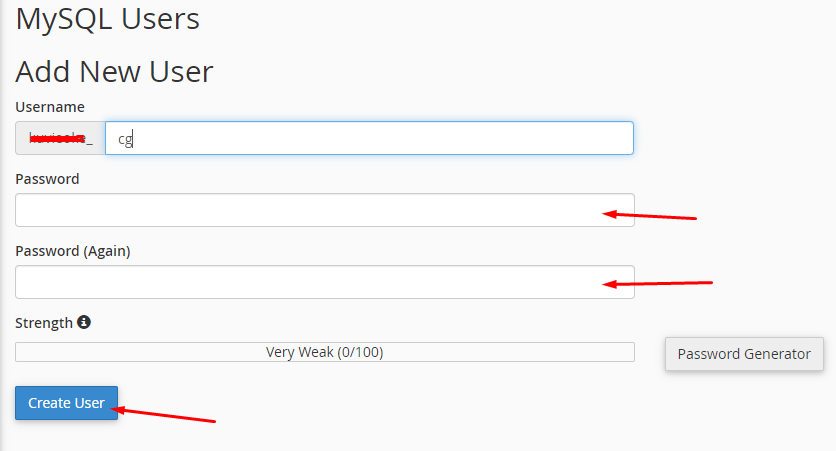
3. Under the option for Add New User, input the new username. We used CG (Codeguard) to indicate it was created for CodeGuard. Enter any password of your choice or betterstill use the Password Generator option to get a stronger password. Ensure you save this password. Click on create user.
Â
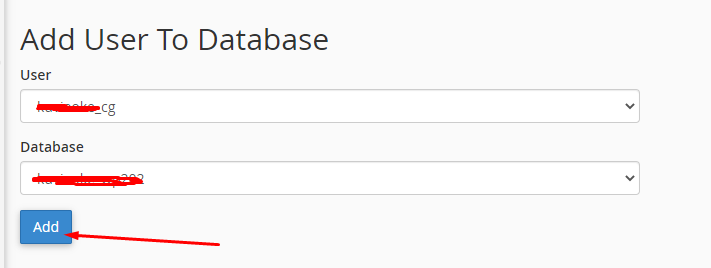
4. Add the new user to your database.Â
Â
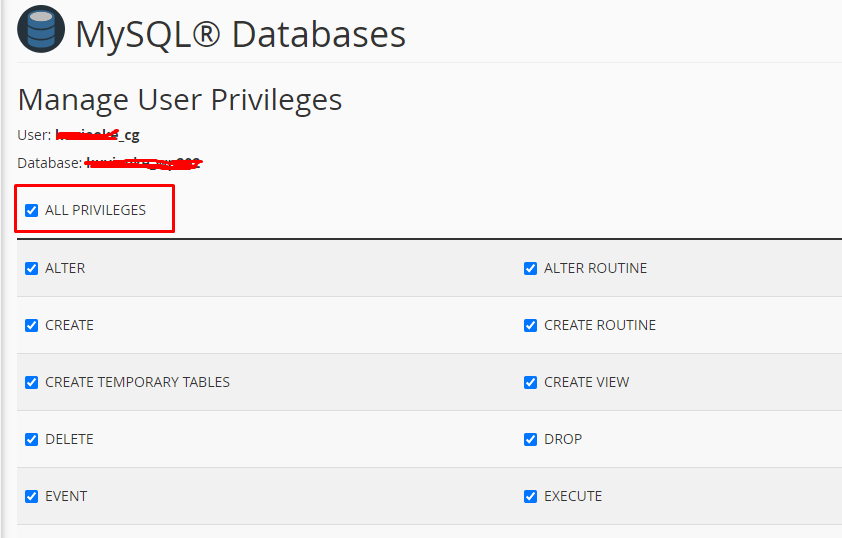
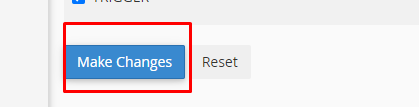
5. Tick the box to grant all priviledges to the user. Scroll down and click on Make Changes.
Â
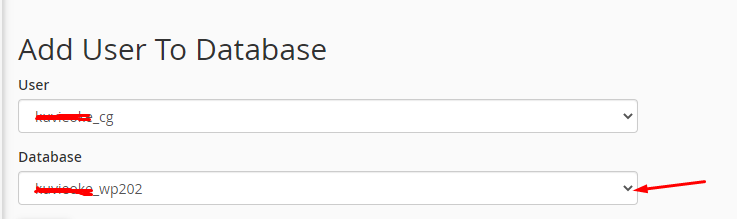
6.Repeat the same process if you have more than one database. To locate other databases, click on the drop down arrow under Database. You will see a list of all your databases. Click on each one and add the new user.
How To Backup You Database(s).
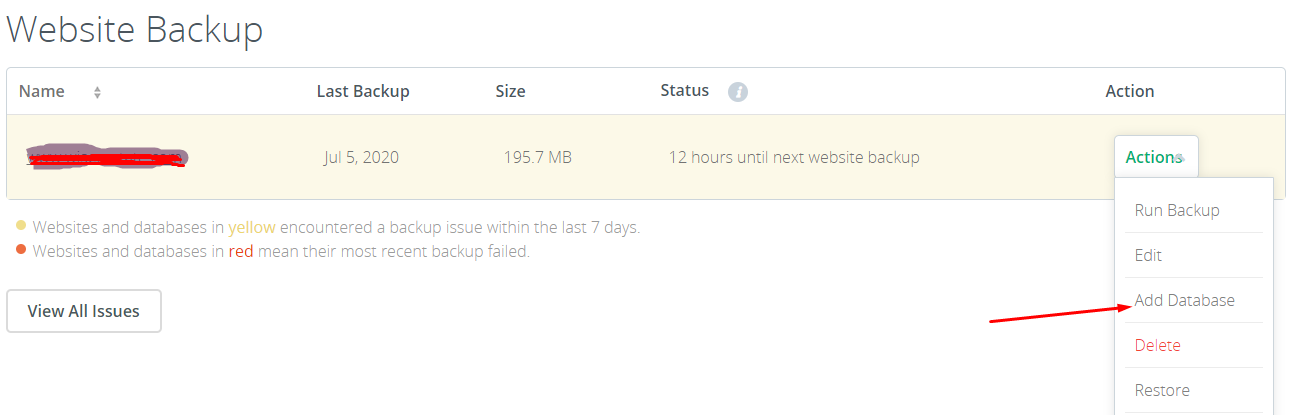
1. On your Dashboard, scroll down to the section for Website Backup, click on Actions, and select Add Database.
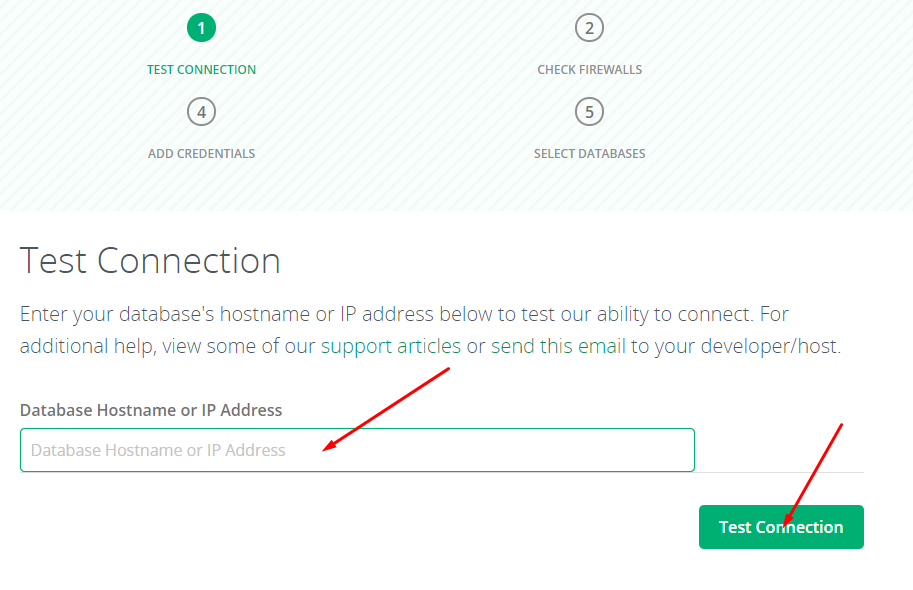
2. Enter the hostname or the IP address of the server your account is hosted on. The hostname is the name of the server your account is hosted. You can get these informations from the Cpanel login details sent to your registered email address. Click on Test Connection.
Â
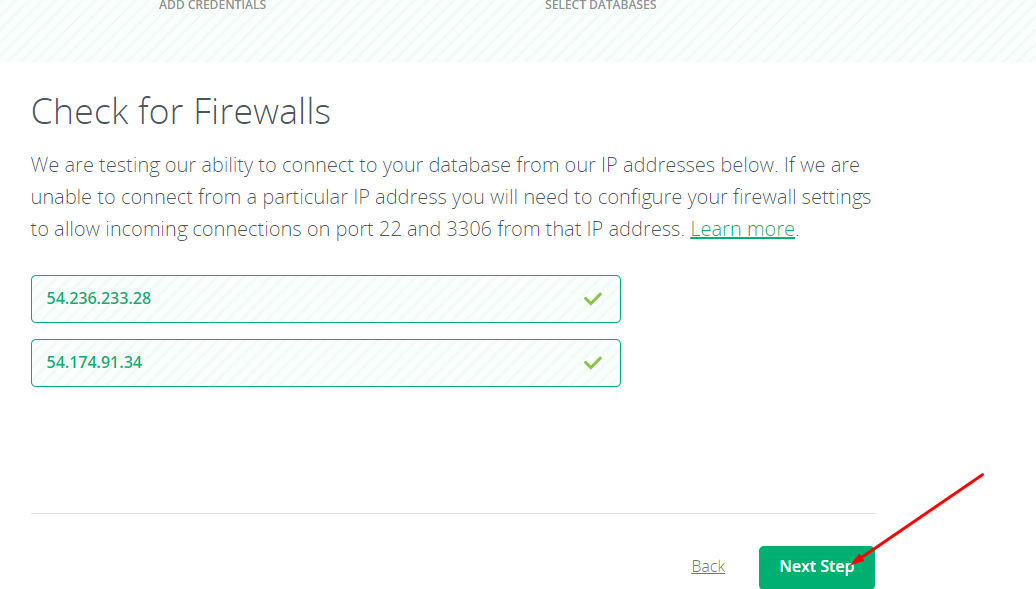
3. This step requires checking the firewalls, to ensure there is nothing blocking the connection to your database with the IP addresses in the image below. If both IPs are ticked, click on Next Step.
Â
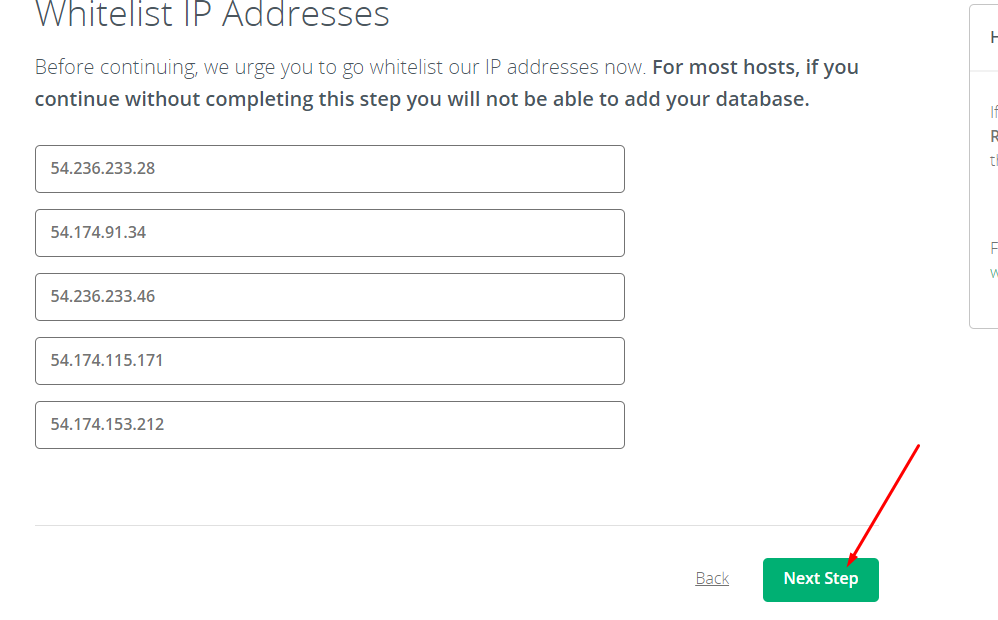
4. The IP addresses listed here have been whitelisted on our servers. Go ahead and click "Next Step".
Â
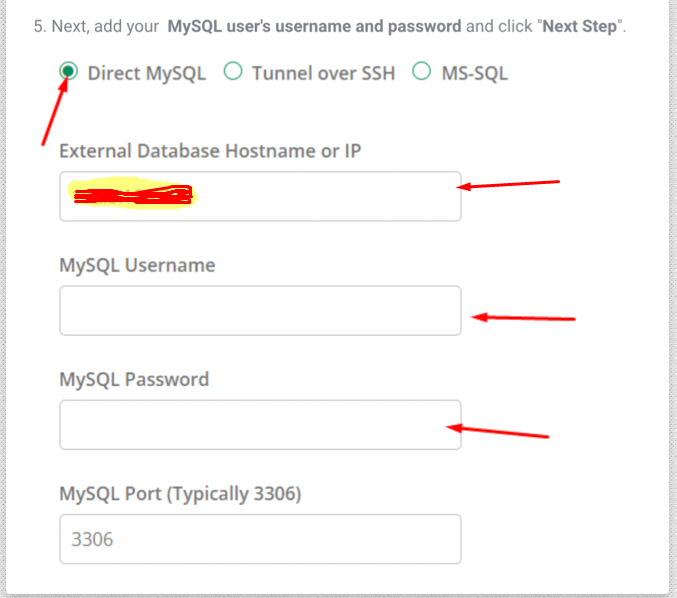
8. Next, add your new  MySQL user's username and password and click "Next Step". (The same one you created for Codeguard following the steps above)
Â
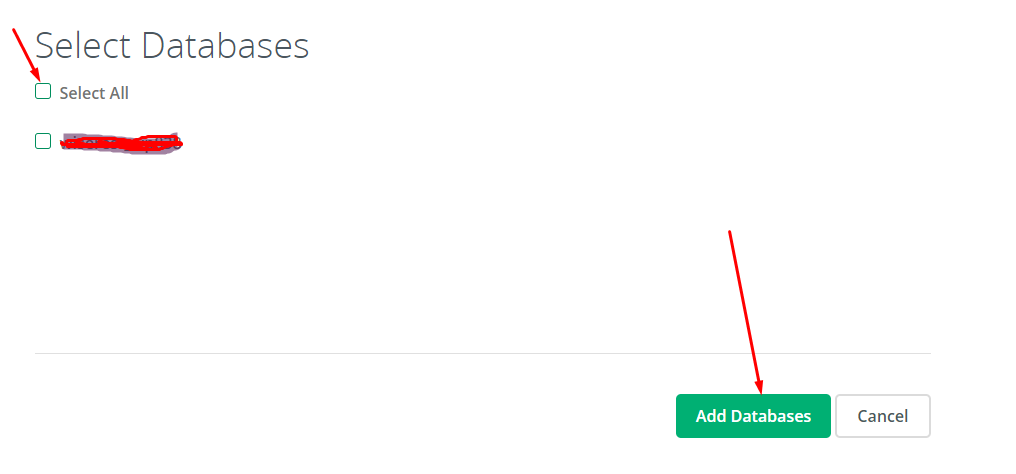
6. Next, you will see the list of all of the databases that you added your MySQL user to. Select the databases that you'd like to back up. If you want all of them, click "Select All". Once they are selected, click "Add Databases".
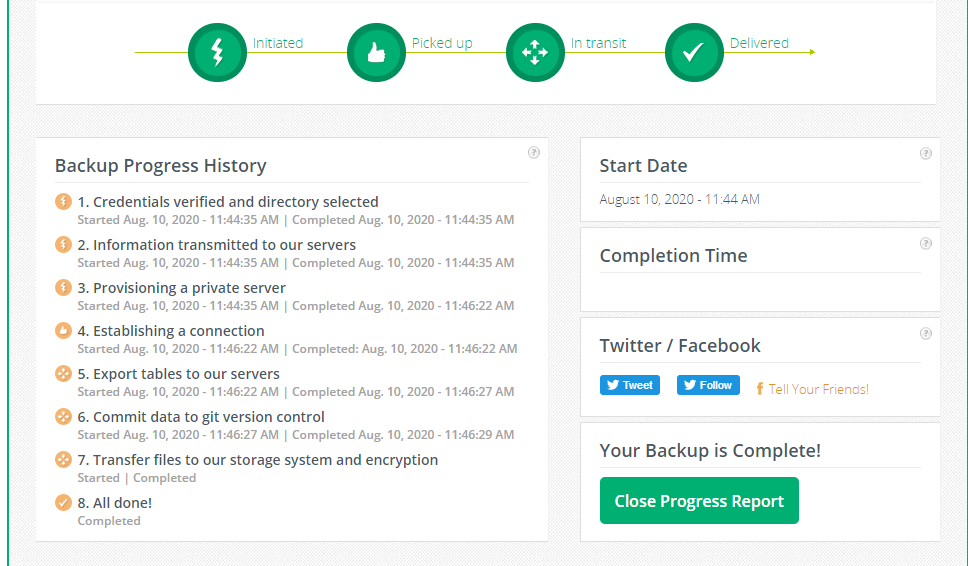
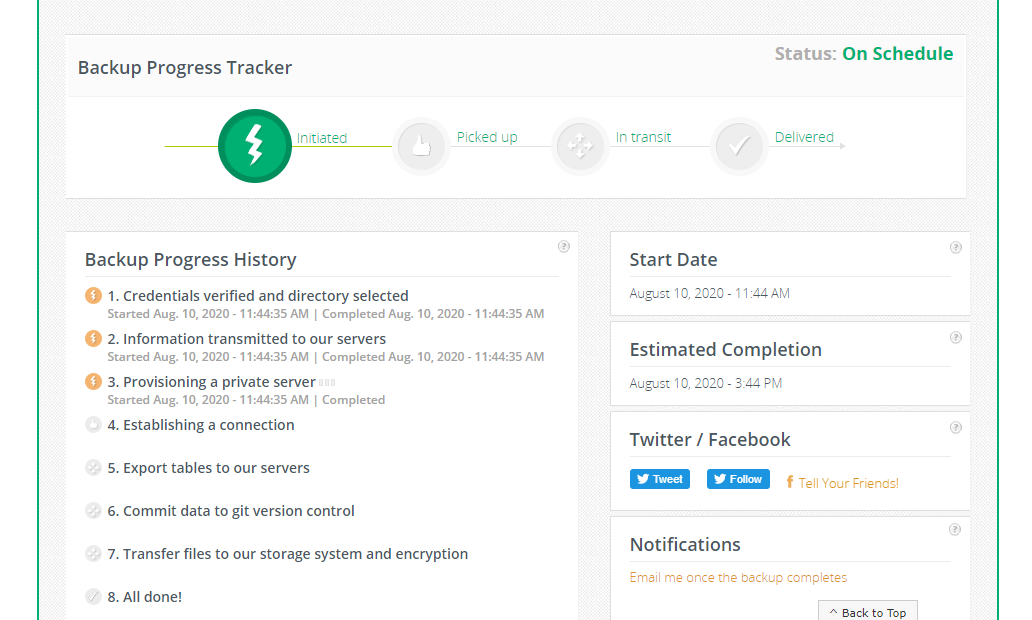
7. Your database backups have begun! For the initial backup, you can track its progress by looking at the backup progress tracker on your screen. It will take you step-by-step through the database's initial backup. You will be notified by email when the initial backup is complete if you do not have the patience to wait for the process to be concluded.
When the process is completed, you will see your first successful backup show on your dashboard like this.