
Step 1: Generate a Certificate Signing Request (CSR)
Before you can issue your SSL, you must generate a CSR code from your hosting account. If you have a cPanel or DirectAdmin hosting account, you can easily create this from the SSL/TLS section of your hosting account. If you are not sure on how to do this, please follow the specific guide below for your control panel
- For cPanel Users: Follow our step-by-step guide on how to generate a CSR in cPanel
- For DirectAdmin Users: Refer to steps 1, 2, and 3 in our article on How to Install a Paid SSL Certificate in DirectAdmin.
Step 2: Configure the Certificate in the Client Area
Once you have your CSR code ready, you will need to submit it to start.the SSL confitguration process.
- Log in to your Whogohost Client Area
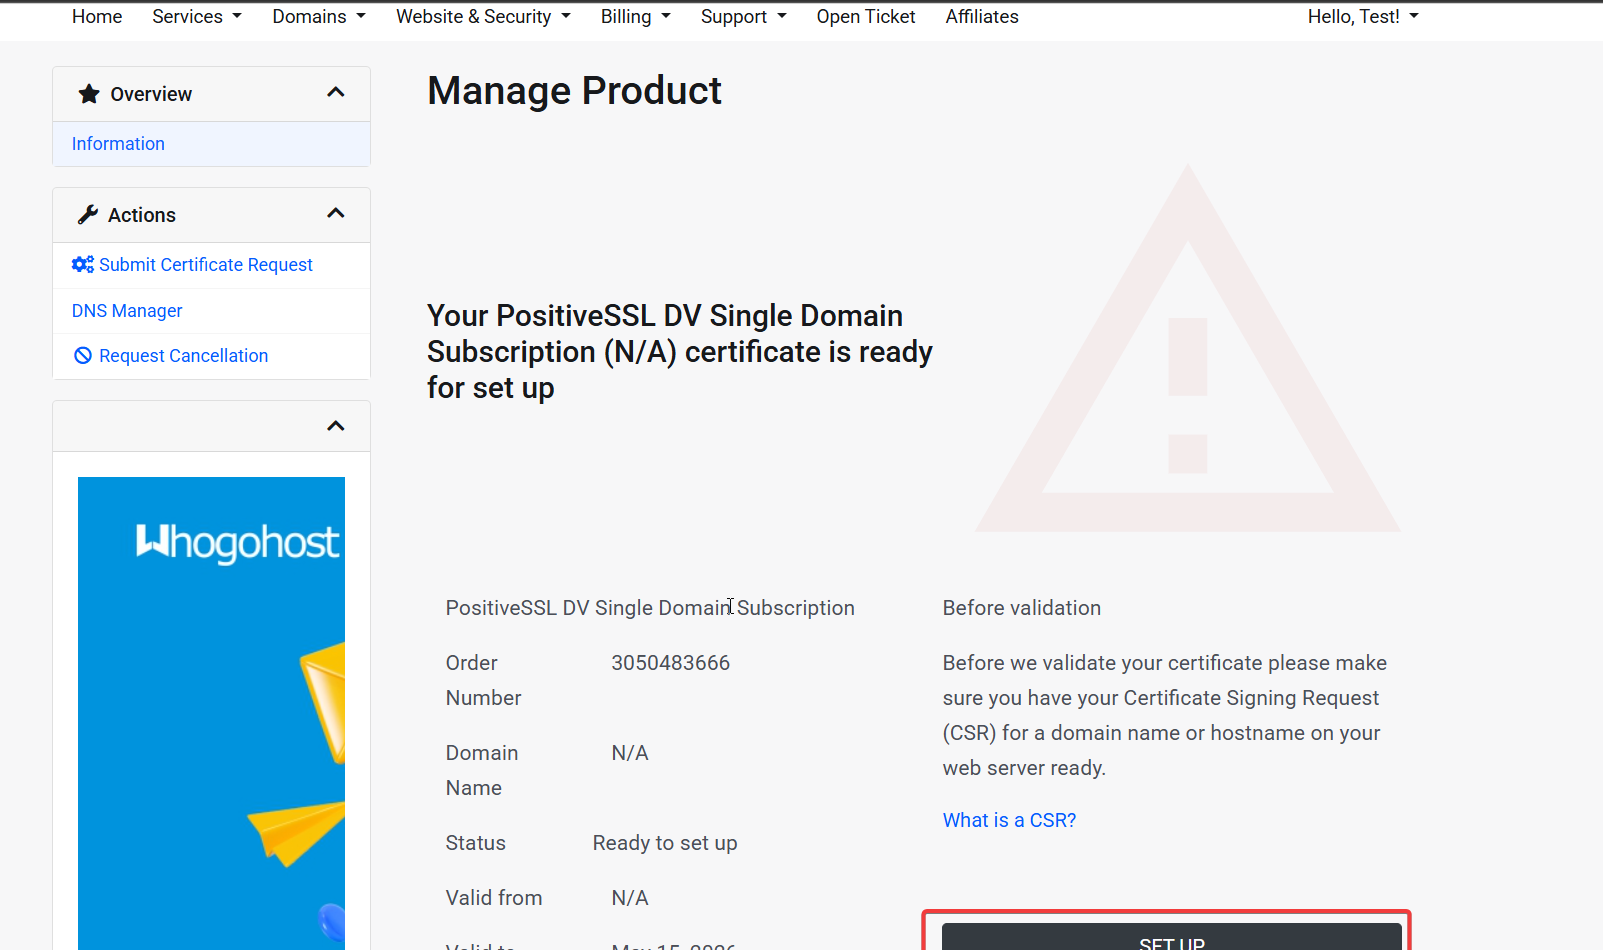
- From the dashboard, go to Services and click on your active SSL product you want to configure.

- On the Manage product page, click the Setup button.
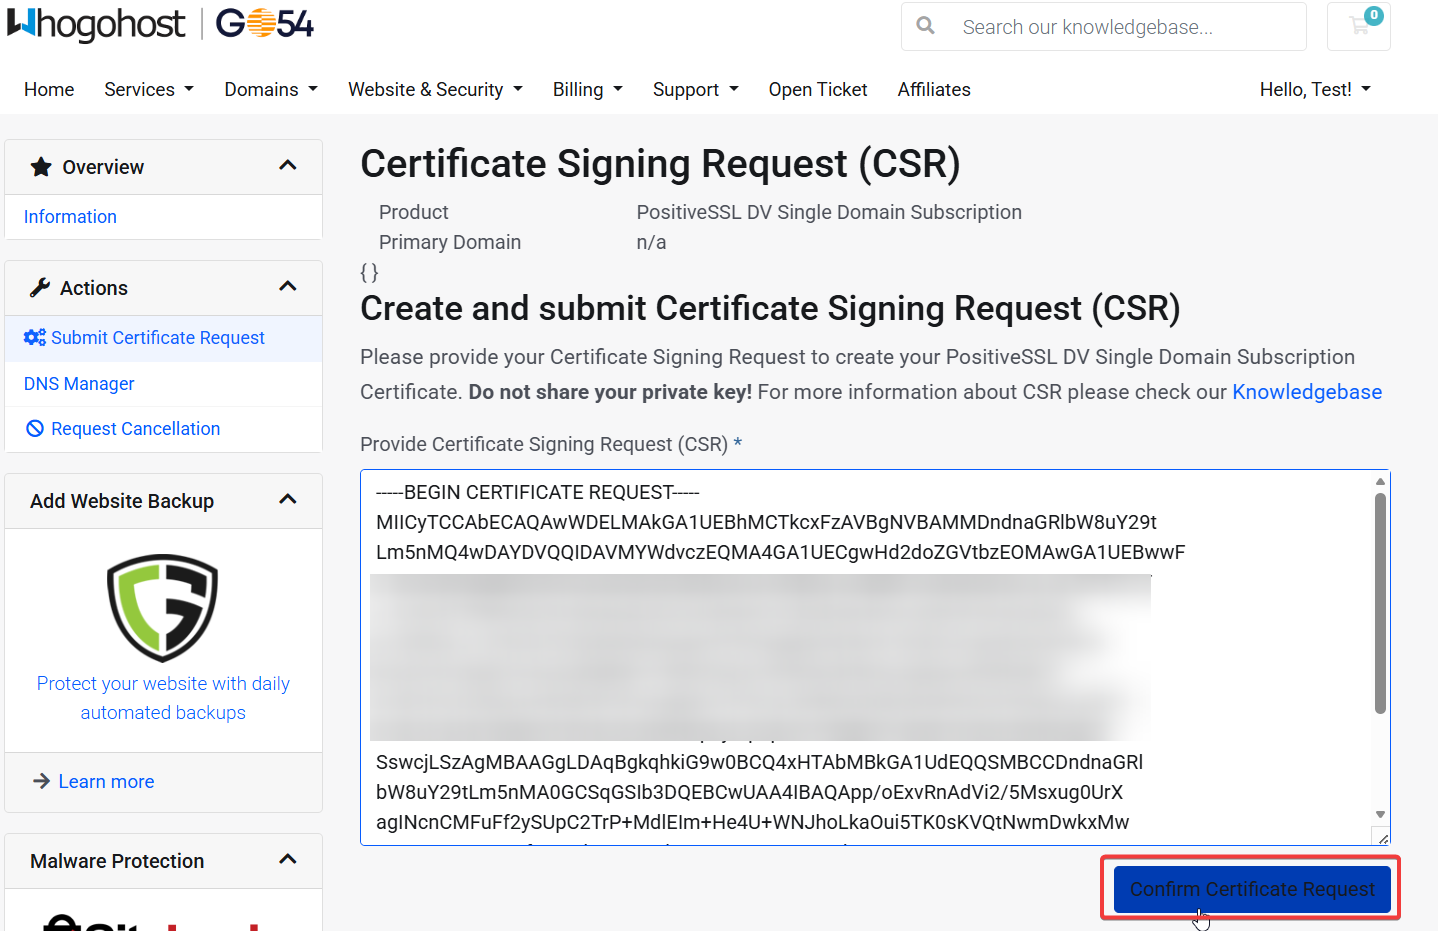
- Open the CSR code you generated in step 1 and paste the CSR code (including the BEGIN and END tags) into the provided field.
- Click Confirm Certificate Request.
Step 3: Choose and Complete Domain Validation
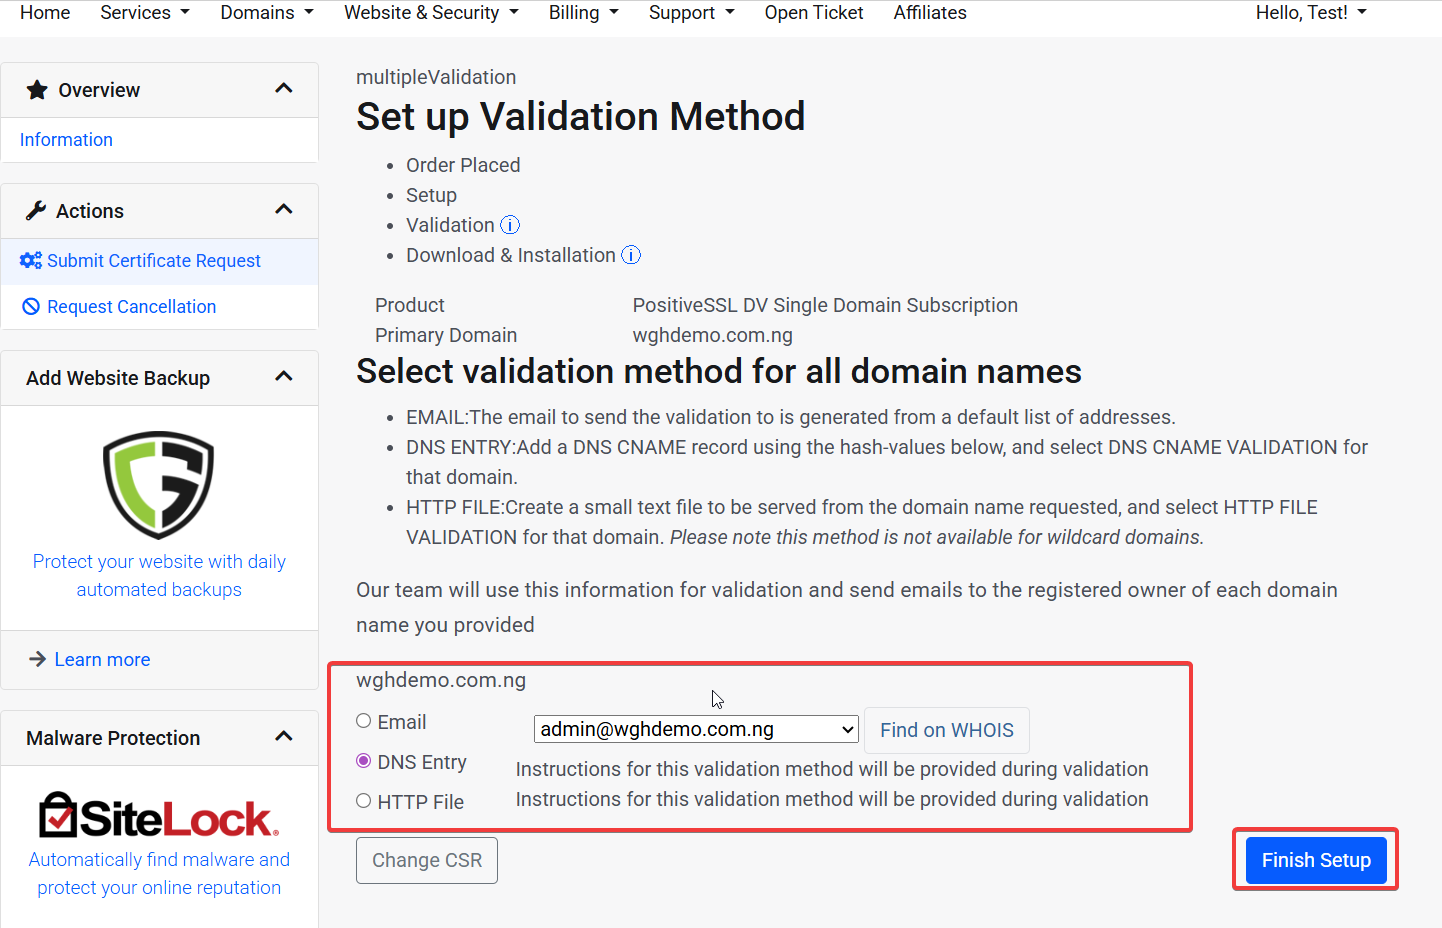
Before issuing the certificate, Sectigo needs confirmation that you are the domain's owner. You can choose one of two validation methods:
- Email Validation: Choose a standard administrative email address (e.g., admin@yourdomain.com) from the dropdown list to receive a verification code.
- DNS Validation: Choose this option to receive a specific DNS record (CNAME or TXT) that you must add to your domain's DNS zone file.
- Choose a domain validation option to either receive a verification email on admin@your domain or DNS option to add a record to your domain DNS
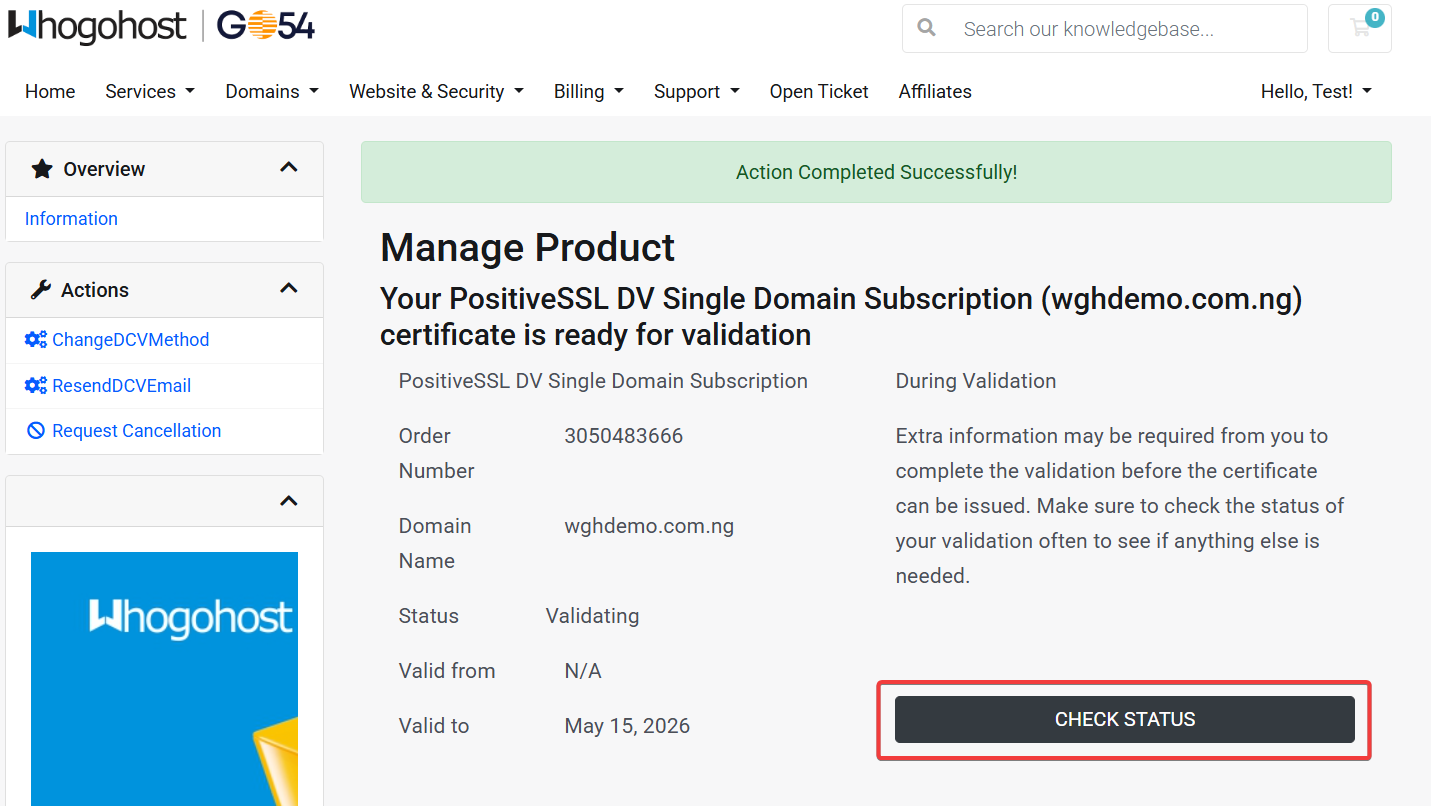
If the status page shows that verification was unsuccessful, don't worry. You can choose an alternative validation method or click Resend Email to try again.
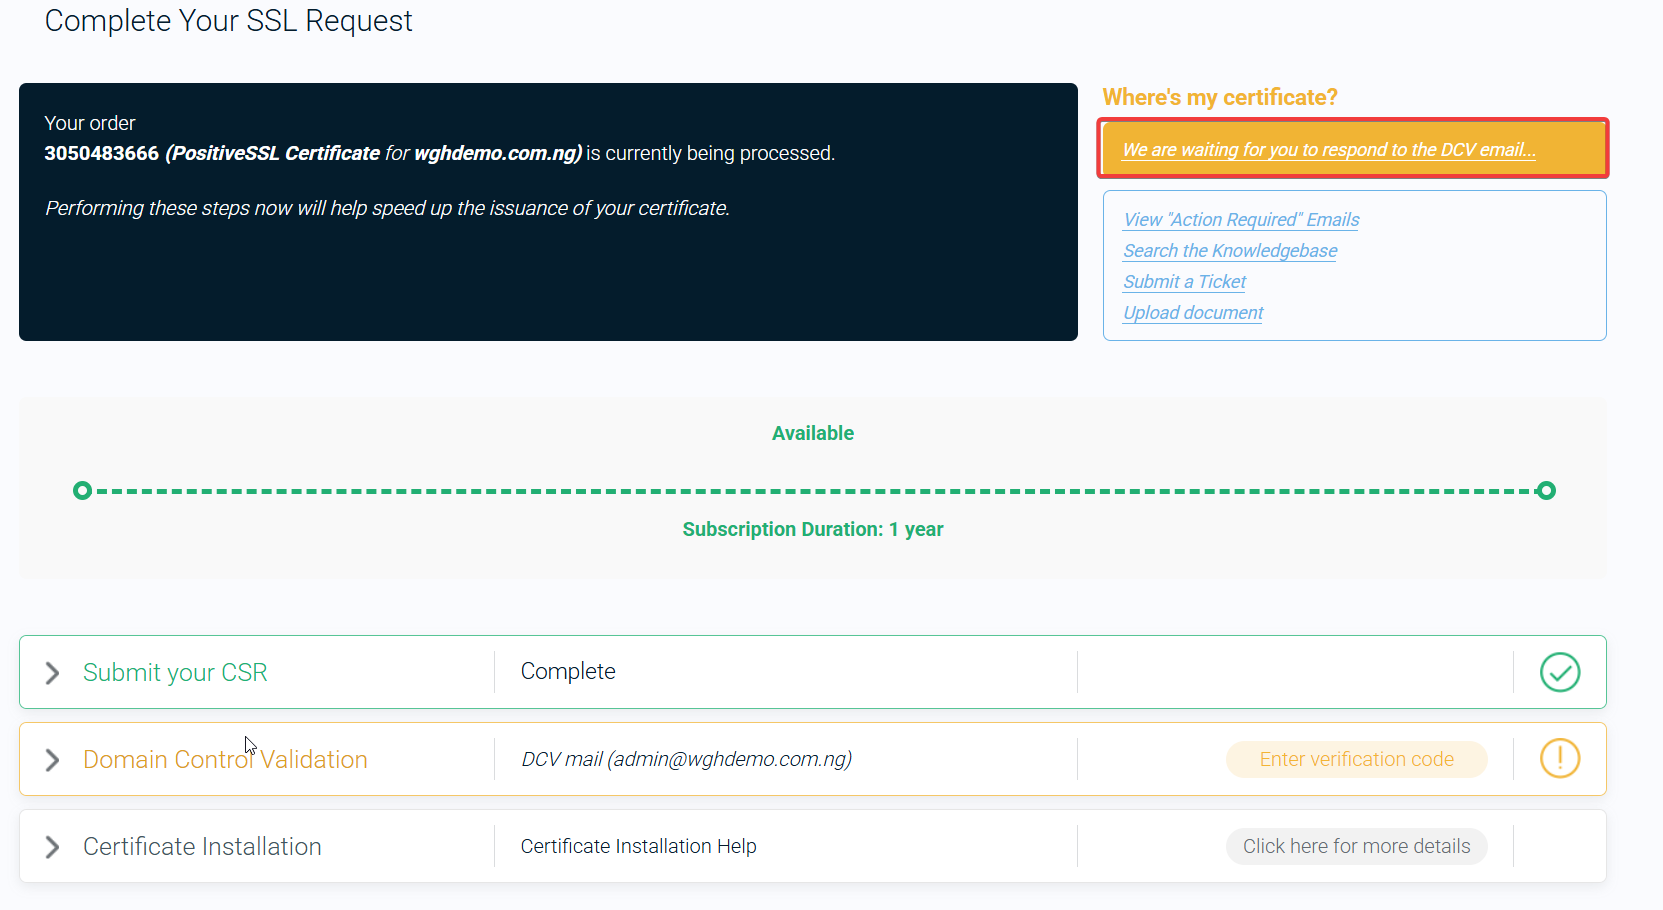
Step 4: Download and Install Your Certificate
As soon as the validation is successful, your SSL certificate will be issued. You will also see the updated status in your client area
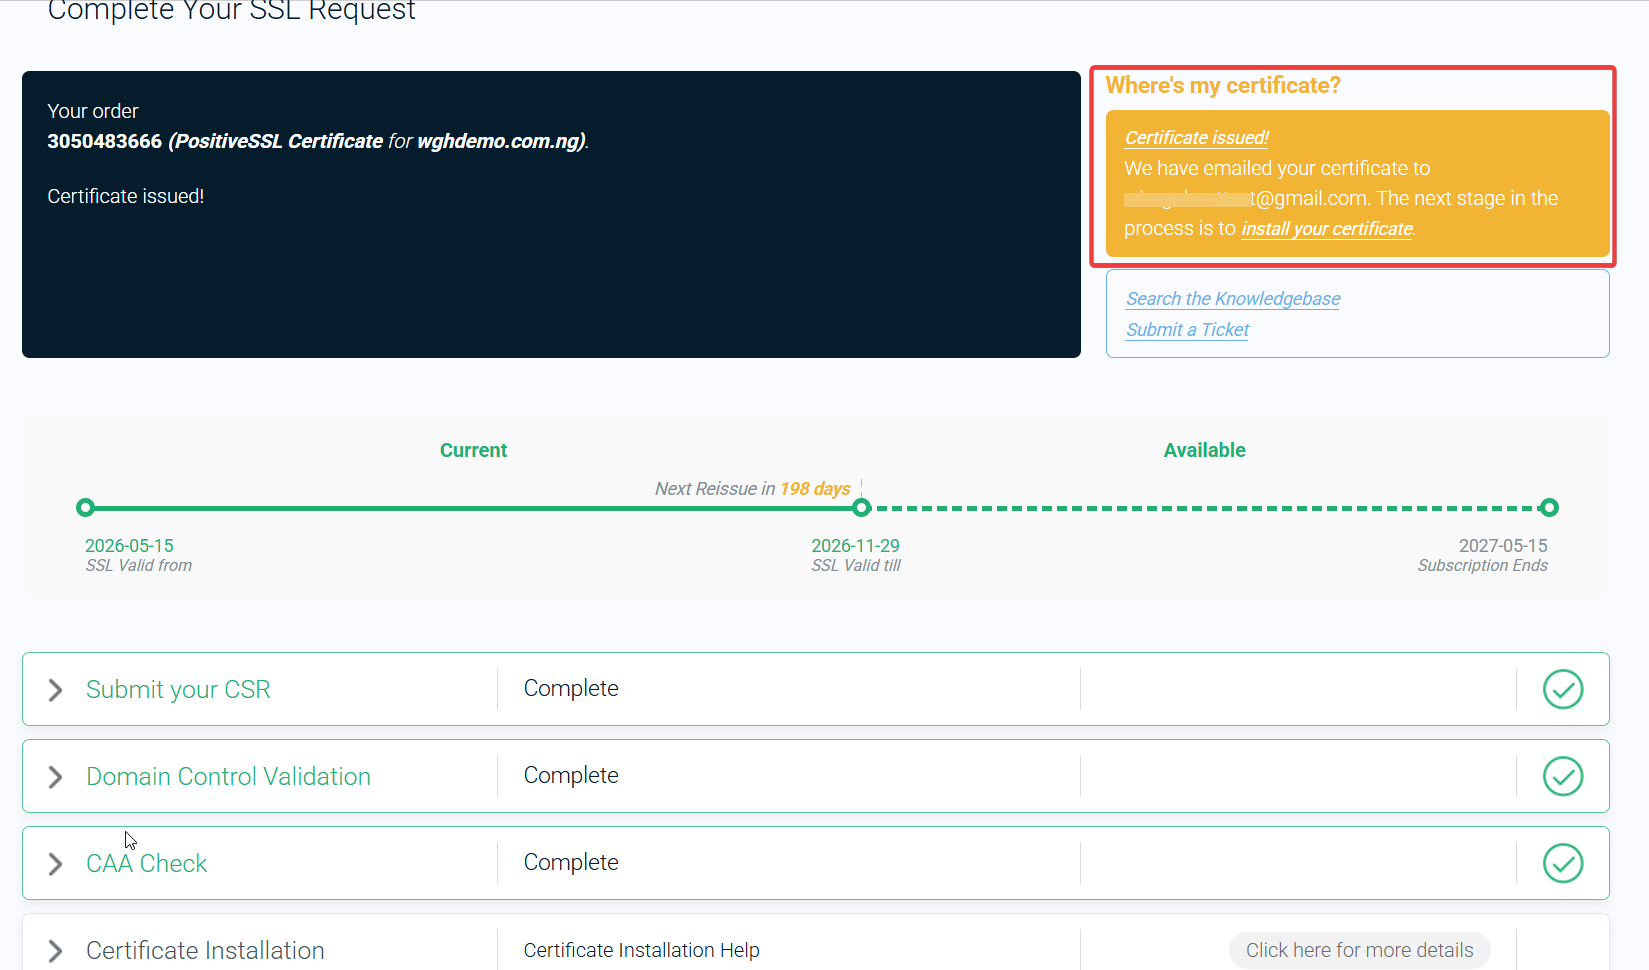
- Check your registered account email address; you will receive an email containing your Certificate (CRT) code.
- Copy the CRT code from the email.
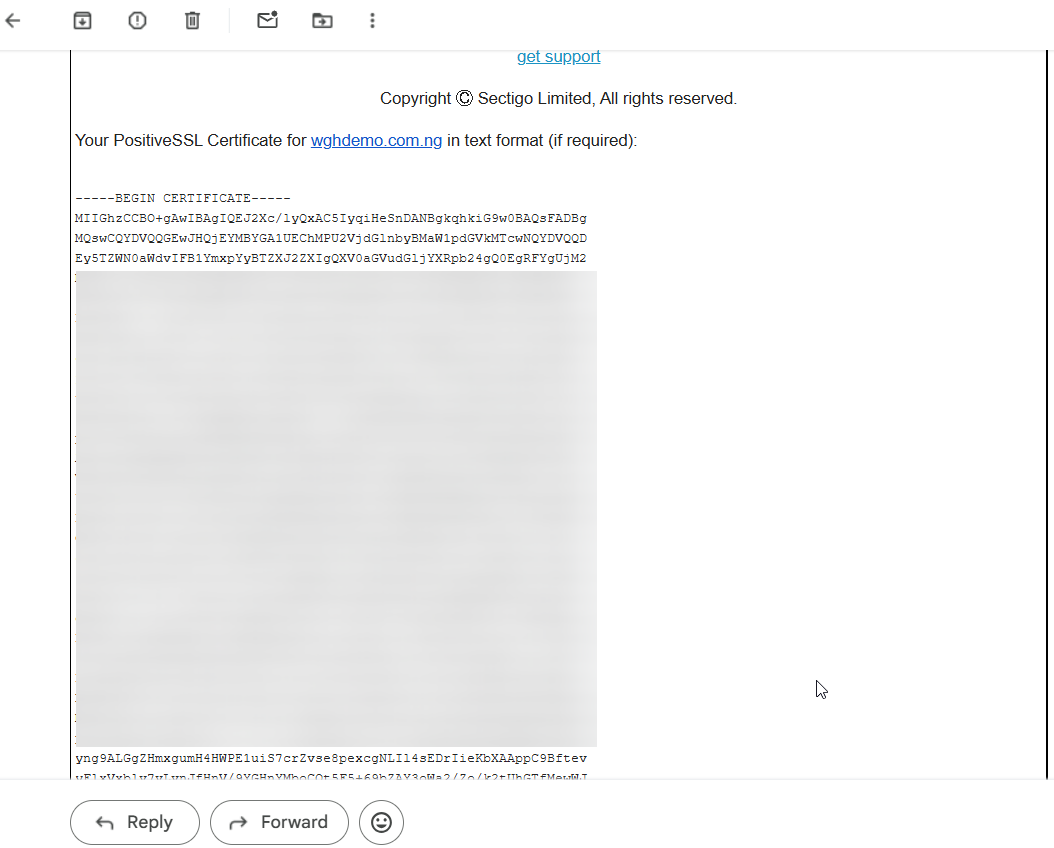
- Log back into your control panel (cPanel or DirectAdmin) to install the certificate and secure your site.