Using Google Search Console gives you access to valuable reports about how your website appears in search results. It also helps Google index your website faster. While it isn’t mandatory, it’s a smart step if you want better visibility.
Before You Begin
You’ll need:
- A Google/Gmail account
- Your website published on the internet
- Your SiteBuilder login
Step 1: Access Google Search Console
- Visit Google Search Console.
- Log in with your Google or Gmail account.
- You’ll be taken to the Search Console dashboard.
Step 2: Add Your Website
- Click Add Property.
- Enter your full website address (URL).
- Use http://www.yourdomain.com
- Or https://www.yourdomain.com if you have SSL installed
- The “www” is required when adding your SiteBuilder URL
Step 3: Verify Your Website
Google requires verification to confirm that you’re the actual owner of the website.
- Choose Alternate Methods.
- Select HTML Tag.
- Google will display a verification code.
- Copy the entire code.
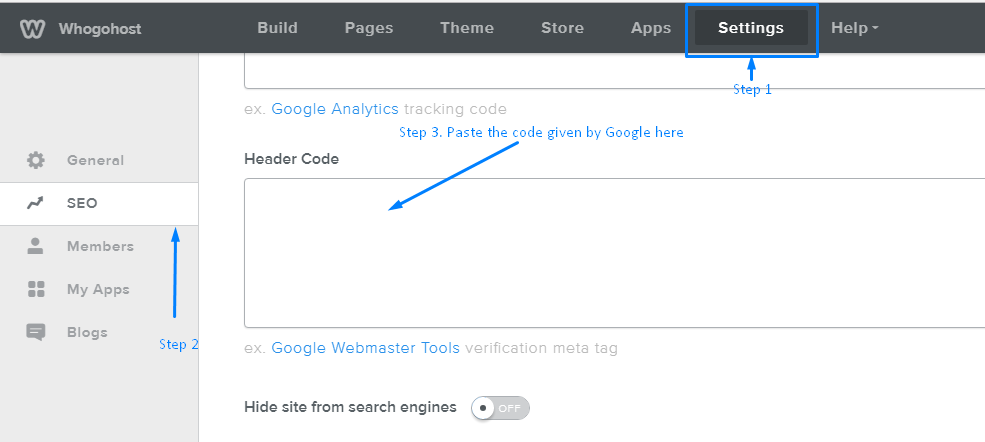
Step 4: Add the Code in SiteBuilder
- Go to your SiteBuilder dashboard.
- Open Settings.
- Click SEO.
- Paste the Google verification code into the Header Code section.
- Save your changes.
- Publish your site so Google can detect the code.
Step 5: Complete Verification
- Return to Google Search Console.
- Click Verify.
- If you get an error:
- Confirm that you have published the site.
- Wait a few minutes and try again.
Step 6: Submit Your Sitemap
Submitting your sitemap helps Google understand your website structure.
- Click Continue to access your dashboard.
- Open the Sitemaps section.
- Click Add/Test Sitemap.
- Enter the sitemap URL:
- http://www.yourdomain.com/sitemap.xml
- Or simply type sitemap.xml
